6 diamond painting mistakes every beginner makes, and how to avoid them
This is the second of three posts in my diamond painting for beginners blog series - you can read my first post, 6 diamond painting tips & techniques for beginners here.
As I explained in that blog post, after being asked to make diamond painting kits that match my cross stitch designs, I did some research and was really drawn to diamond painting as it looked so fun and therapeutic.
I released my first diamond painting kits in autumn 2022, and brought out a few smaller, more manageable kits this year.
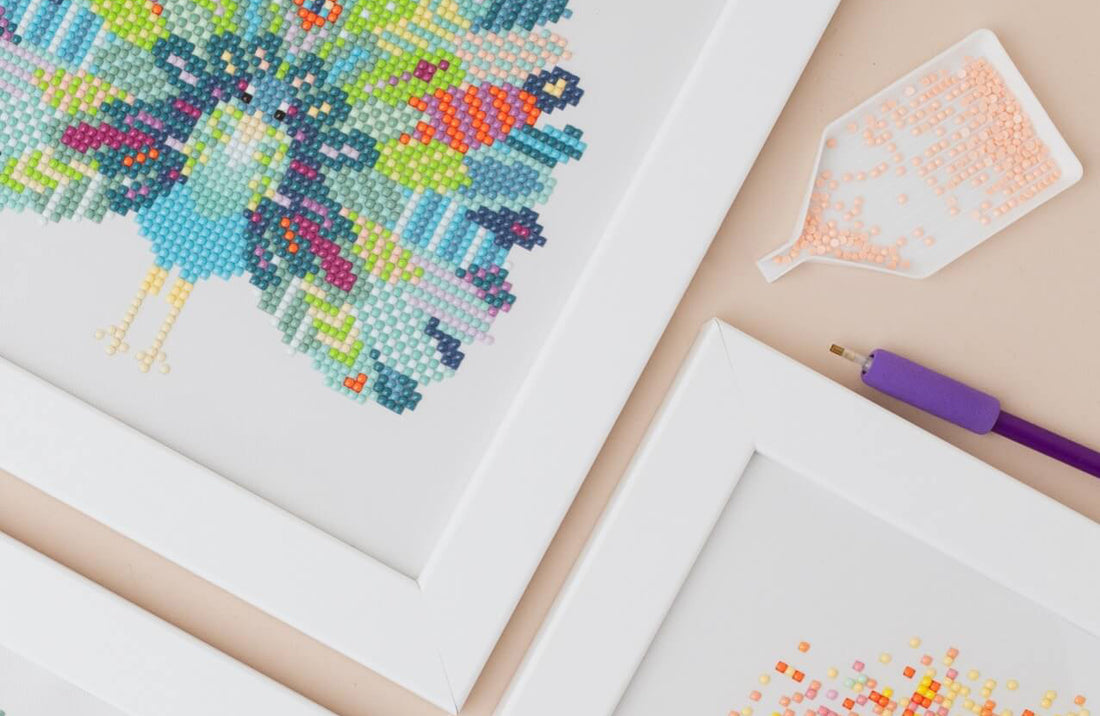
Diamond painting is a relatively new craft which draws inspiration from cross stitch and paint by numbers. You apply thousands of small, colourful resin rhinestones (also known as diamonds or drills) to an adhesive canvas.
The canvas is pre-printed with the design, including symbols, so you know exactly where to place each colour. Your finished diamond painting will be a beautiful and shimmering mosaic-style piece of art that you can display in your home.
Diamond painting can be a little tricky for beginners, so let’s get right into those common mistakes, and how you can avoid them.
1. Starting with a huge diamond painting project
A big project is always pretty daunting, but it can be extra intimidating when you are trying out a new craft. It can be difficult to know where to start, and so it can result in you feeling defeated, rather than spurred on to continue your new hobby.
With diamond painting, it's a good idea to start with a small project to see if you like it first, to test out whether you like the technique and overall finished effect.
Once you’re sure that you enjoy diamond painting, you can work your way up to much bigger projects.

2. Not flattening your diamond painting canvas first
Depending on the size, many diamond painting canvases are posted in a tube, meaning that the canvas arrives rolled up.
If you don’t flatten your canvas before starting your diamond painting, it will be much harder to place your diamonds, and they could end up being unevenly distributed, resulting in a less neat final piece.
Plan ahead: a day or two before you intend to start your diamond painting, use a few heavy books to flatten your canvas.
3. Not putting your diamonds away
Diamond painting is on the less messy end of the crafting scale, as long as you properly store your diamonds.
Can you imagine the nightmare of someone knocking your loose diamonds over, and then trying to pick them out of a carpet?
There are ways to avoid that painstaking task: properly resealing your bags of diamonds, and not leaving diamonds laying around unattended is the best place to start – children and animals will knock them over.
In addition to that, make sure you put one colour of diamonds away before getting another colour out - if multiple colours get mixed together then it’s game over for your diamond painting.
4. Rushing through your diamond painting canvas
I know it’s so exciting seeing your diamond painting come together, but don’t rush it. This is meant to be a really mindful activity, and taking your time is important.
Going slowly and methodically will also ensure that you’re putting the correct diamonds in the correct place, and will help all the diamonds look neat and straight too, meaning that your diamond painting will look much better when it’s finished.

5. Uncovering your canvas while working on it
A diamond painting canvas comes with a protective film, because it has an adhesive surface.
If you remove the entire film when you start diamond painting, dirt and fibres will stick to it, which will not only make the canvas less sticky, it’ll also make the canvas look messy.
Instead, only uncover the part of your diamond painting canvas that you’re working on, and re-cover when you move onto the next bit.
I have given you a couple of tips on how best to keep your canvas covered in my previous blog post, 6 diamond painting tips & techniques for beginners.
6. Sealing your canvas before cleaning your finished diamond painting
Many people like to seal their diamond painting once it’s finished, to preserve and protect it while it’s on display.
However, if you neglect to clean the canvas before sealing, all the dirt, fibres, hairs or marks that are present will be there on display forever.
I find the best way to clean your finished diamond painting is to use tweezers to pull out any fibres or hairs that shouldn’t be on your canvas, and you could use a soft damp cloth to remove any marks.
So now you know what not to do, and you know my 6 diamond painting tips & techniques for beginners, keep your eyes peeled for the third post in my diamond painting beginner’s blog series.
If I’ve convinced you to give diamond painting a go, have a look at my colourful and fun diamond painting kits based on my most popular Meloca Designs cross stitch kits.