6 diamond painting tips & techniques for beginners
I discovered diamond painting back in 2019, when someone messaged me on Instagram asking if I'd ever considered turning my designs into diamond painting kits. They hated sewing, but loved diamond painting and my designs.
Over the years, I had more and more people asking the same thing, and after researching it decided it looked really fun and therapeutic.
Eventually, in autumn 2022, I released a small range of diamond painting kits based on my most popular cross stitch designs. I even complete my own finished samples for my diamond painting kits, because it's so fun and much quicker than cross stitch.
If you’re totally new to diamond painting, you’re in the right place - I’m going to tell you all about it and give you my top tips for diamond painting beginners.
Let’s start with the basics.
What is diamond painting?
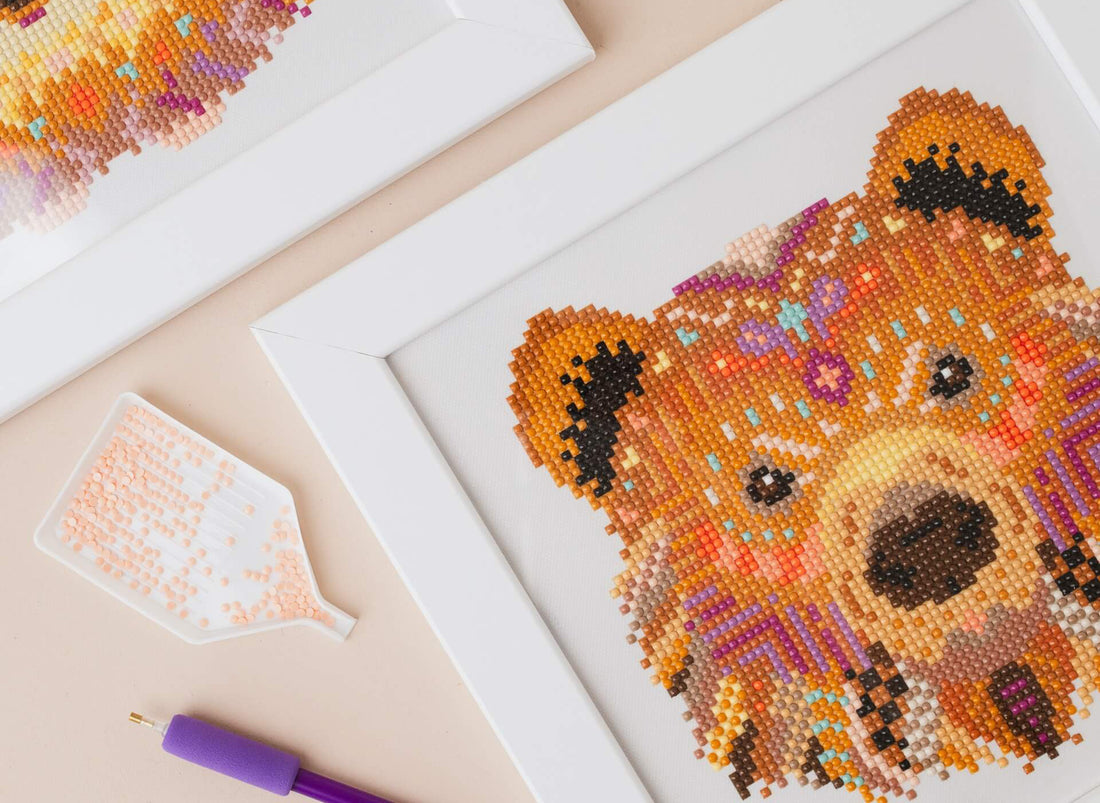
Diamond painting is the art of placing small, colourful resin rhinestones with flat bottoms (otherwise known as diamonds or drills) onto an adhesive canvas printed with a design that tells you where to place each colour.
The printed design is usually made up of both colours and symbols, which will correspond with the legend to make it clear which colour drill or diamond to place where.
The result is a beautiful work of art, with a similar feel to cross stitch or mosaic, except that it’s super sparkly. It’s also pretty much mess-free, and you don't need to be a good painter or cross stitcher to create stunning, shimmering works of art.
Like cross stitch, it’s a really mindful craft too, and has become increasingly popular over the last few years, when we’ve all been reaching for activities to do with our hands that don’t involve looking at a screen.
Here are my top tips for those starting to dip their toe into the world of diamond painting.
1. Start with a diamond painting kit
For pretty much any craft, I would always recommend that beginners start with a kit, and diamond painting is no different.
Good quality diamond painting kits will come with everything you’ll need to create your diamond art, including instructions and tools such as an applicator pen, wax, diamond tray, tweezers, and of course the colourful drills and adhesive canvas.
When you’re confident enough, you could buy blank canvases and freestyle or create your own diamond painting design. You could also use any leftover drills from your previous kits on your own diamond painting project.

2. Flip your applicator pen to stick down multiple diamonds
Diamond painting kits often come with a double-ended applicator pen, with one end for placing single drills, and the other end being a multi-placer, which allows you to stick down multiple drills at once (usually between 3 and 5 drills).
This multi-placer tool is perfect for larger areas of the same colour, saving time as you don’t have to place each drill individually, and it also helps the drills to be lined up more accurately, resulting in a neater diamond painting.
3. Use tweezers to pick up & move diamonds
Some diamond painting kits include a pair of tweezers, but if you find your kit doesn’t have any, they’re easy to find in craft shops and online.
Diamond painting can be a bit fiddly to begin with, as the drills are very small, and you may still be getting to grips with all the different symbols, meaning you may place the drills in the wrong place.
Don’t worry though - they can be removed. As the drills are so small, removing them from the adhesive canvas with your fingers would be pretty tricky, but tweezers with a small head are perfect for the task.
Gently prise the drill from the canvas and place back in the tray, before replacing with the correct colour.
4. Keep sections you are not working on covered
When starting a diamond painting, you shouldn’t completely remove the protective film from the canvas, but instead go section by section, folding back and replacing the film as you go.
Keeping sections covered prevents dust, dirt, hair and fibres sticking to your canvas.
If you have removed and discarded the protective film, you can use parchment paper to protect your diamond painting instead. Cut the parchment paper into smaller pieces, so you can work on small sections of the canvas at a time.
5. Use a magnetic cover minder on the protective film
A magnetic cover minder is similar to a needle minder for cross stitch and embroidery, but instead of holding your needle in place, it holds the protective film on your diamond painting out of the way.
You place a loose magnet underneath the canvas and a decorative magnet on top, which holds the film back without damaging your diamond painting.

Meloca Designs needle minders
6. Use washi tape to section off your canvas
If you have a large diamond painting canvas and want to focus on one particular area, using washi tape to section off that area works really well.
Sectioning off areas makes a large diamond painting more manageable, and helps to keep the rest of the canvas covered and clean. You can see how to do this in this brilliant video by Diamonds & Washi on YouTube.
You could also use washi tape as a fun, decorative border on your canvas once it’s finished.
Once your diamond painting is finished, you can display it in a frame behind glass to keep it protected, or use a waterproof sealer like Mod Podge, which comes in both paint-on and spray-on forms.
Good luck to those of you starting this fun new craft, and please do head back to the Meloca Designs blog soon to read the next in my 3-part diamond painting for beginners series.