A Beginners Guide to Cross Stitch
Cross stitch has made a HUGE comeback in the last few years. This is mainly from people looking for hobbies to reduce their screen time, people looking for a healthy and therapeutic way to unwind in the evenings, and also from many people suddenly having A LOT of spare time for activities during lockdown.
It is so easy to learn how to cross stitch, and our handy guide in this article will get any beginner stitching in no time at all!

What is cross stitch?
Cross stitch is the transfer of a design on a chart onto a piece of fabric. The person stitching uses embroidery thread to place “X's” on the fabric that correspond to symbols or colours on the chart. Each symbol or colour on the chart represents one “X” on the fabric and the different symbols and colours on the chart represent different colours of thread. Please see below for examples of this.
Colour chart: 
Symbol chart: 
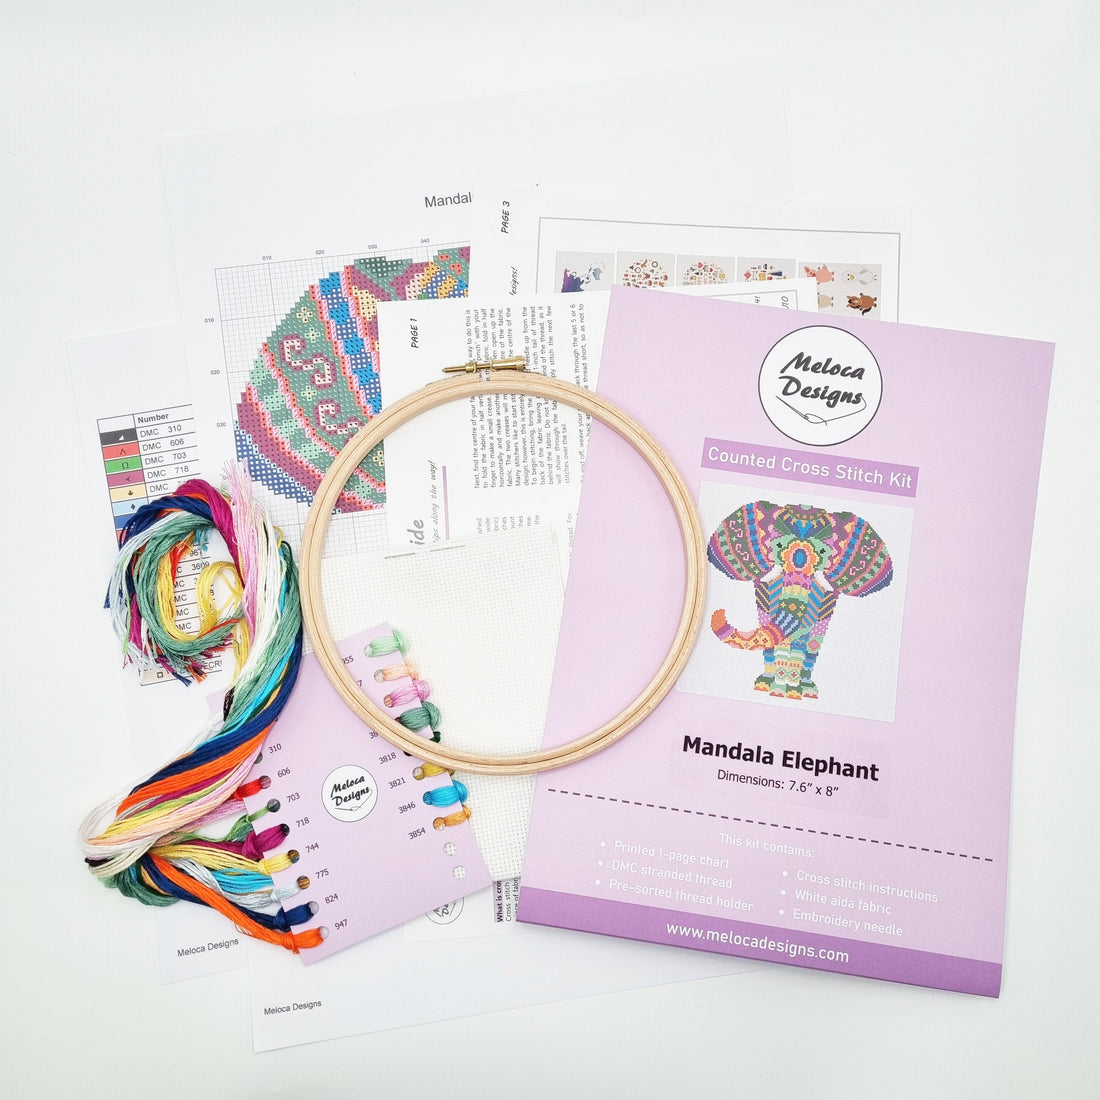
Stitching essentials
There are a few items required to get you started on your exciting stitching journey. Many of these items can be found in Meloca Designs' cross stitch kits. The only item you will need to supply yourself is a pair of sharp scissors, which I'm sure you can probably find laying around your house. All of the below are included in our kits as standard, except for an embroidery hoop, which you have the option of adding on if you want to.
So, the essentials and a brief explanation of them are:
- Cross stitch chart and colour key
In paper or PDF format, this is the design you choose to stitch.
- Cross stitch instructions
These are useful for complete beginners, as they include text and photos to show you how to stitch.
- Aida fabric
Our kits include 14 count aida fabric. 14 count aida is easier for beginners as the holes on the fabric are quite spread out. Linen is also popular to stitch on for advanced stitchers. Iron your fabric before stitching to soften the fabric, enabling your needle to pierce through easier. To keep fabric from ravelling, you can use a sewing machine to sew the edges or use fray stop to prevent fraying.
- DMC thread
Our kits include high quality 6-stranded DMC thread. For cross stitching, you separate these to use 2 strands at a time. Please do not use all 6 strands, as you will run out of thread very quickly!
- Needle
One sharp needle is included in our kits, which enables you to complete different types of stitches that some of our designs require. However, some people may prefer to use a needle with a blunt point and a large eye. If this is the case, a size 24 or 26 tapestry needle is recommended.
- Embroidery hoop
A wooden or plastic embroidery hoop is useful to hold fabric whilst you stitch. Remove the fabric from the hoop when you are not stitching to keep from getting 'hoop marks.'
How to cross stitch
To begin your cross stitch, find the centre of the graph (for Meloca Designs’ patterns, this is shown with arrows and red centre lines).
Next, find the centre of your fabric. An easy way to do this is to fold the fabric in half vertically and "pinch" with your finger to make a small crease. Open the fabric, fold in half horizontally and make another "pinch", then open up the fabric. The two creases will mark the centre of the fabric. Many stitchers like to start stitching near the centre of the design; however, this is entirely up to you.
There are two different cross stitch methods. Both require two strands of thread. It is up to you as to which method you use. The first method is to complete a row of half stitches (////), then work back (\\\\) to complete the “X's”. The second method is to complete each “X” as you go.
Method 1: 
Method 2: 
Ensure that all “X's” cross in the same direction. The top thread of the “X” should always slant in the same direction to make the finished piece look even.
To begin stitching, bring the threaded needle up from the back of the fabric leaving about a 1-inch tail of thread behind the fabric. Do not knot the end of the thread, as it will show through the fabric. Simply stitch the next few stitches over the tail.
To end off, weave your needle back through the last 5 or 6 stitches at the back and cut the thread short, so as not to leave a loose tail.
Cross stitch kits suitable for beginners
If you're feeling confident enough to give cross stitch a go, we recommend starting with any of the below kits to ease yourself in. All of our kits are suitable for beginners, however these are the ones that are most popular with complete beginners. Just click the photos to discover more.


